- Windows: F12键
- Mac OS: option+command+i键
- 打开网络请求
Network - 请求网址http://aimer1124.github.io/后,
Network中便会有本次的网络请求内容
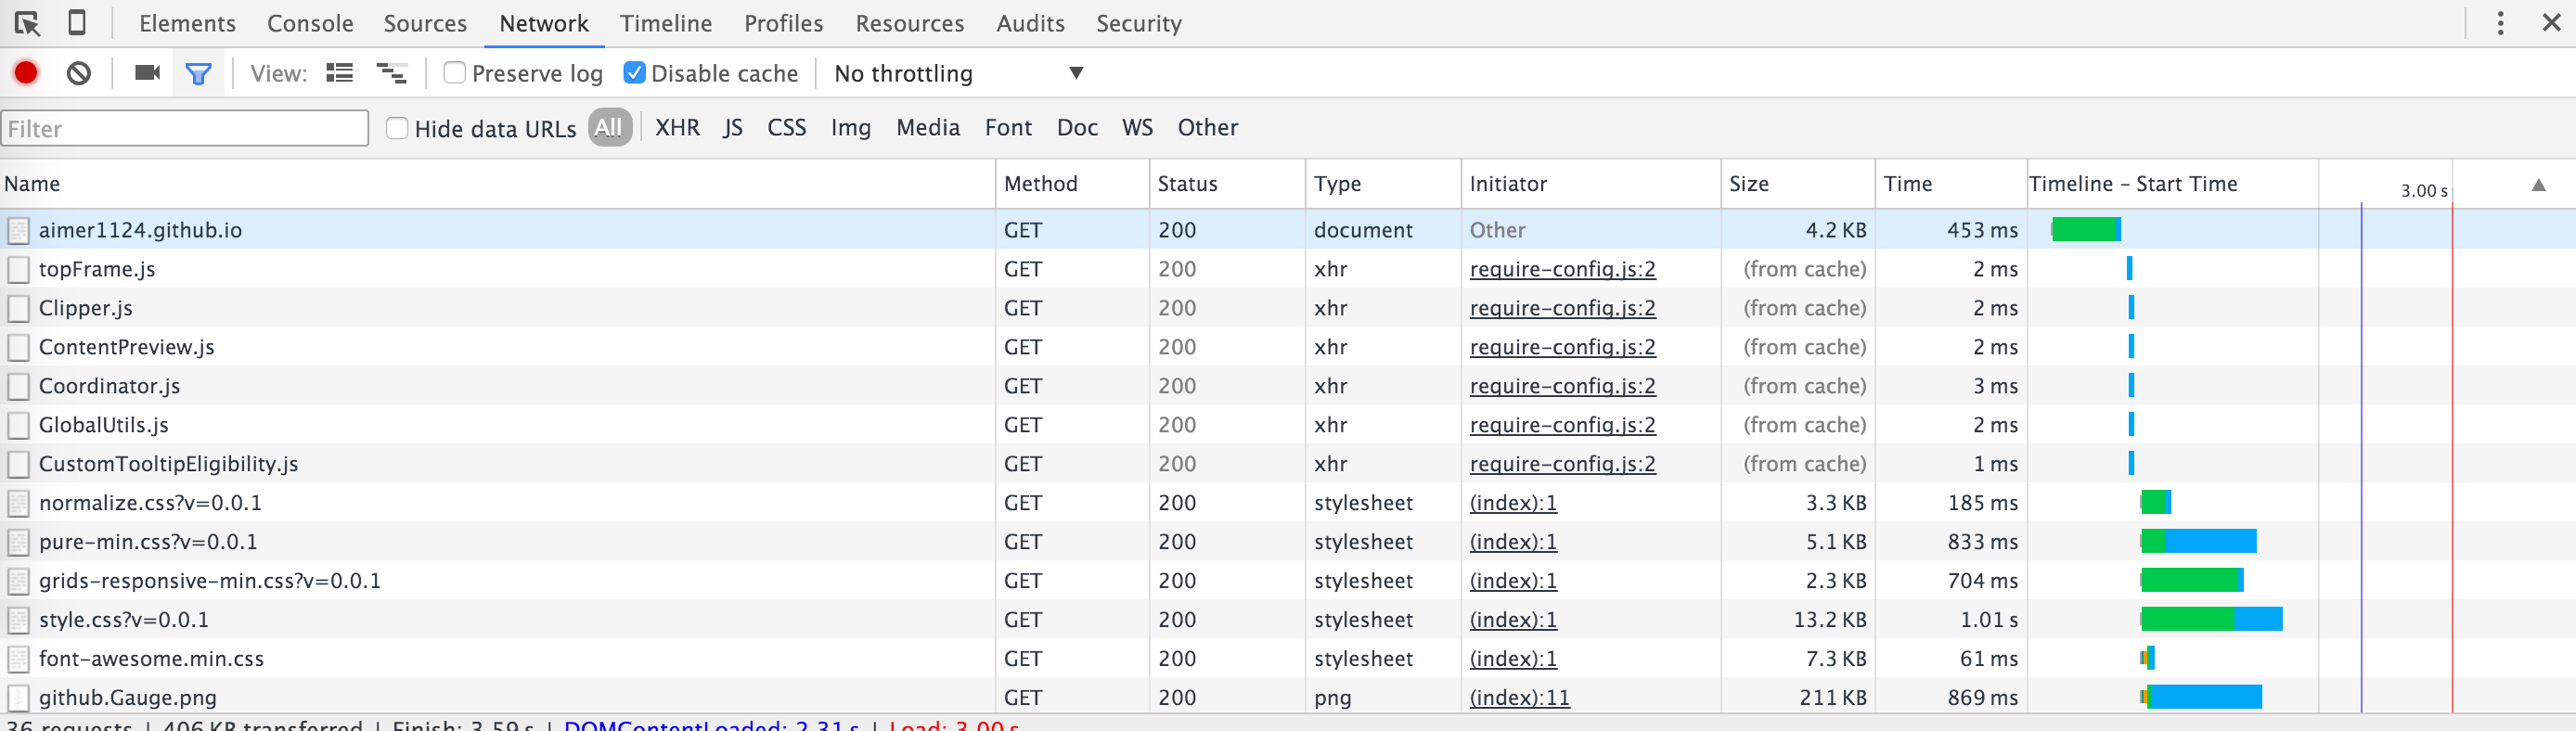
- 点击第一条请求
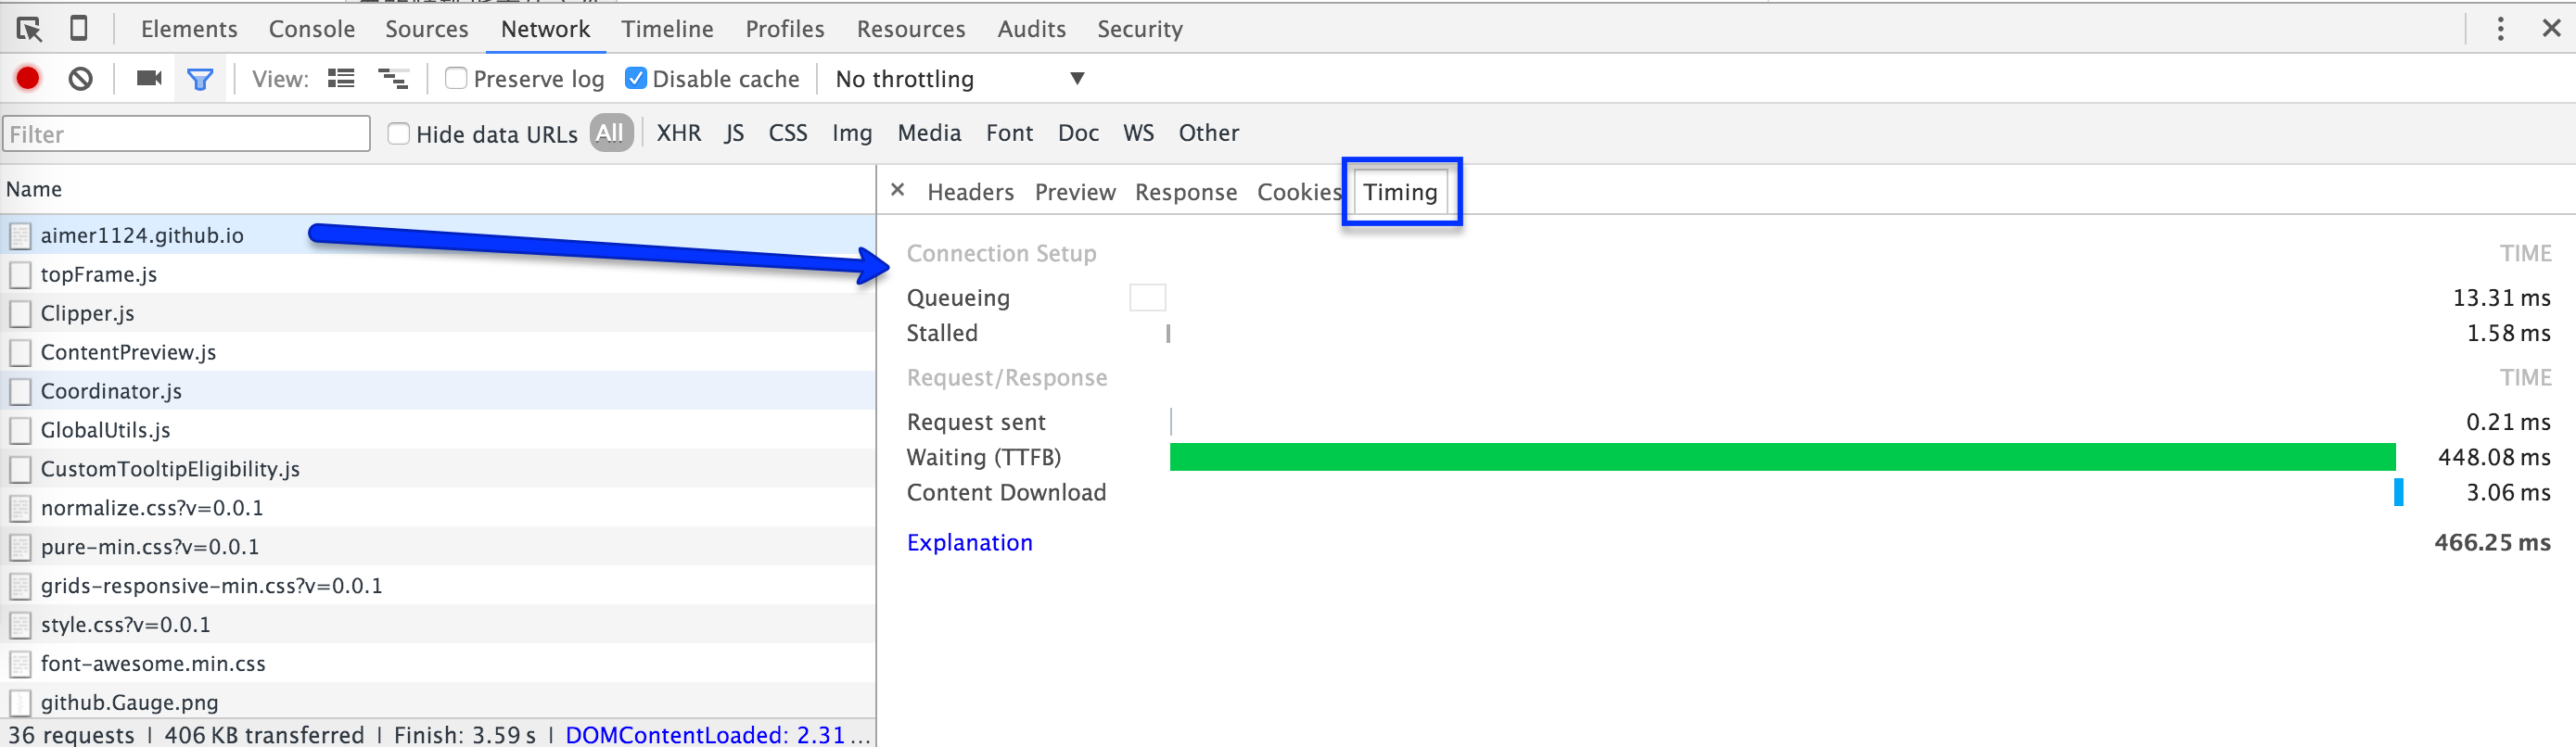
http://aimer1124.github.io/,可查看到此网络请求的详细信息Request/Response - 切换到
Timing栏中,显示具体的请求时间消耗
- 切换
Headers、Preview、Response、Cookies,也可直接查看对应的信息
设置网络延迟和带宽#
- 点击
No throttling会显示出Chrome已提前设置好常用的网络延迟和带宽,供直接选择
| 网络类型 | 带宽 | 延迟 |
|---|
| Offline | 0kb/s | 0ms |
| GPRS | 50kb/s | 500ms |
| Regular 2G | 250kb/s | 300ms |
| Good 2G | 450kb/s | 150ms |
| Regular 3G | 750kb/s | 100ms |
| Good 3G | 1Mb/s | 40ms |
| Regular 4G | 4Mb/s | 20ms |
| DSL | 2Mb/s | 5ms |
| WiFi | 30Mb/s | 2ms |
- 选择
GRPS,clear网络请求,再次刷新页面,查看请求http://aimer1124.github.io/的Timing
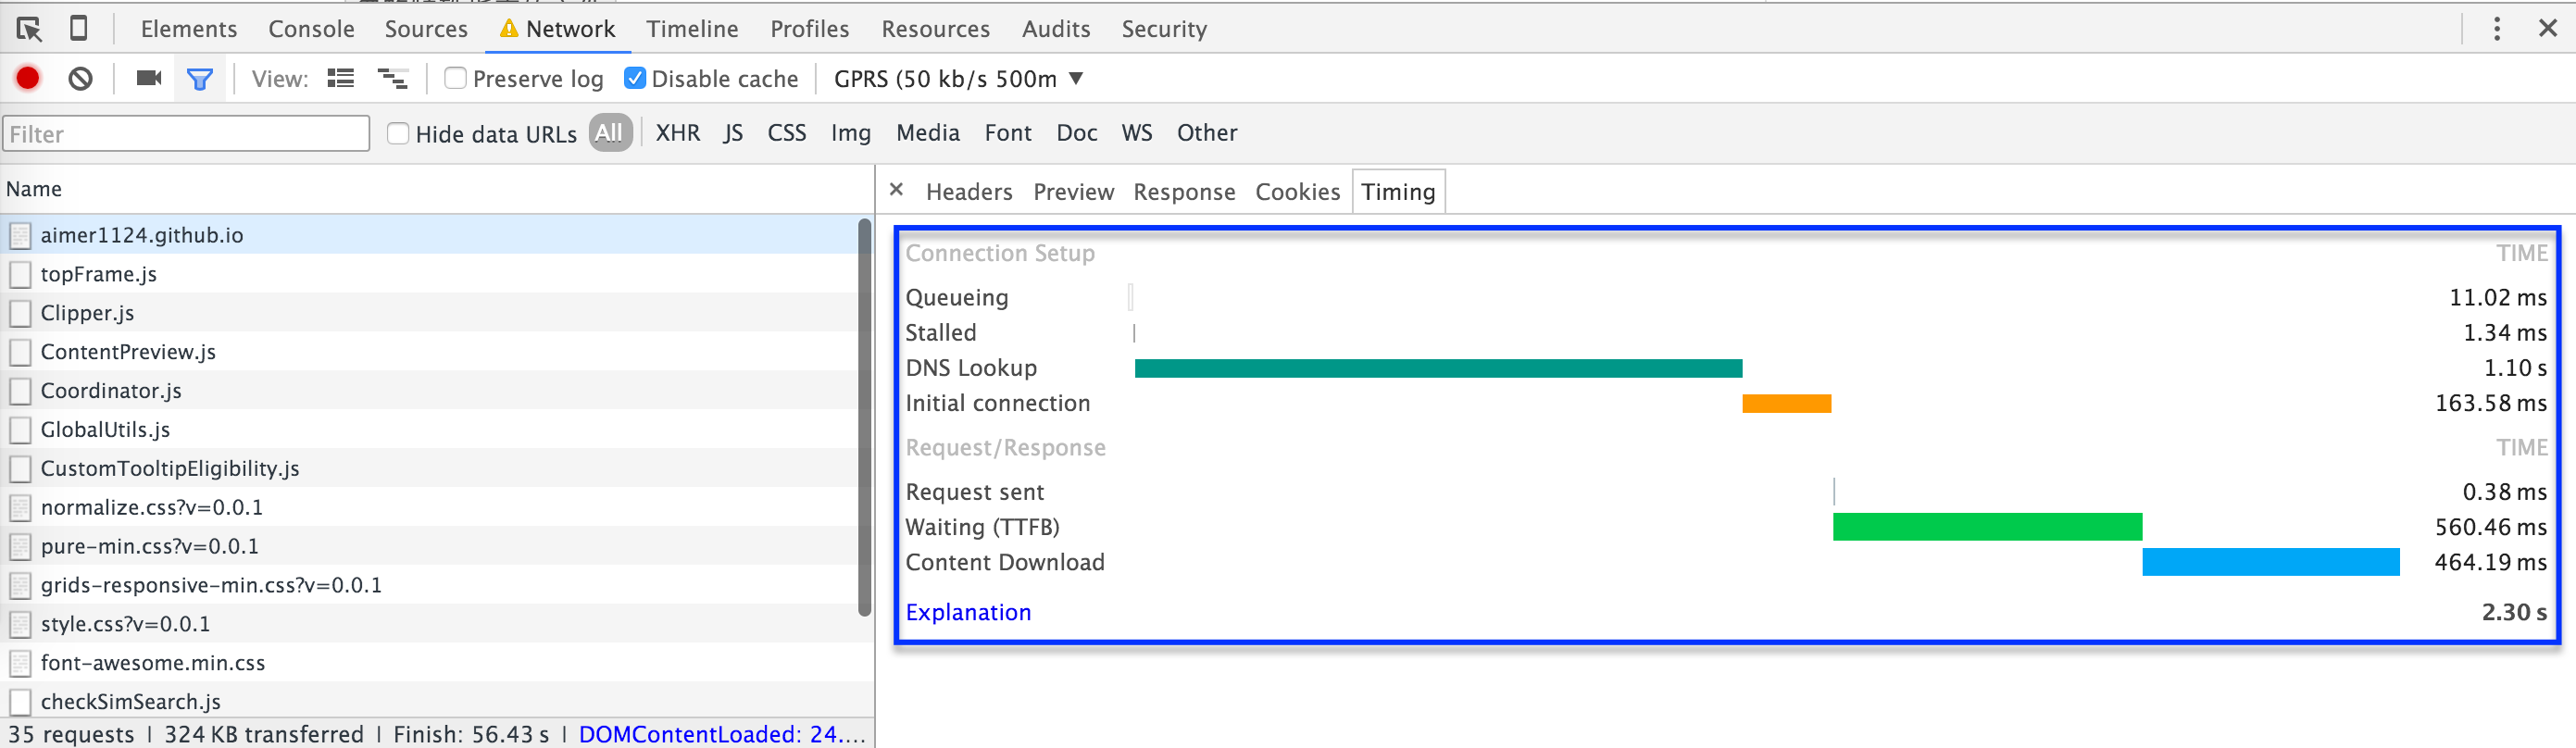
- 此时,可查看到对应的网络延迟已经
生效
自定义网络延迟和带宽#
- 点击
No throttling-Custom-add进入Network Throttling Profiles设置页面 - 设置
Profile Name:slow1S,Throughput:10,Latency为:1000

- 关闭设置框,切换
No throttling为slow1S,自定义网络延迟与带宽设置完成
